Pages

Saturday, November 24, 2012

Sugar Bug Bake Shop Sale


For the past six weeks, my three oldest grandchildren have joined me every Friday to bake up an inventory to sell to family members. We made a few crafty items too, so our vendor's carts would groan with irresistible goodies for our guests. Finally, when those were done and grandma's freezer could hold no more, we set a date and welcomed our shoppers - grandparents, aunts, uncles, and parents - to browse our quaint little marketplace. I'm glad you stopped by too, because we are....
                                                       
                                                             Now Serving
                                                                   YOU!

When our 13 adult guests arrived, this front door event poster, featuring grandma's "sweet as sugar, cute as a bug" bakers greeted and welcomed them to the home of my twin grandsons.....

....where a market square of vendor's carts, one for each young entrepreneur, awaited. 
At left is Bree's pink push cart, with Nick's stand at center.....

....and Sae's little "supersonic" (he loooves airplanes!) shop right around the corner.

For a festival feeling, two garlands, tied with yarn, spelled out "BAKE SALE" and connected the three little carts.

Brielle conducted business from the "Bumble Bree Shop," so named because her Halloween debut as a two month old bumblebee earned her that affectionate nickname two years ago!


"Nick's Turnpike Treats" wasn't randomly named either. As a twin, and therefore no stranger to waiting and sharing, he asserts himself by calculating time and loudly announcing, "Nick's turn!" after he's been patient long enough!

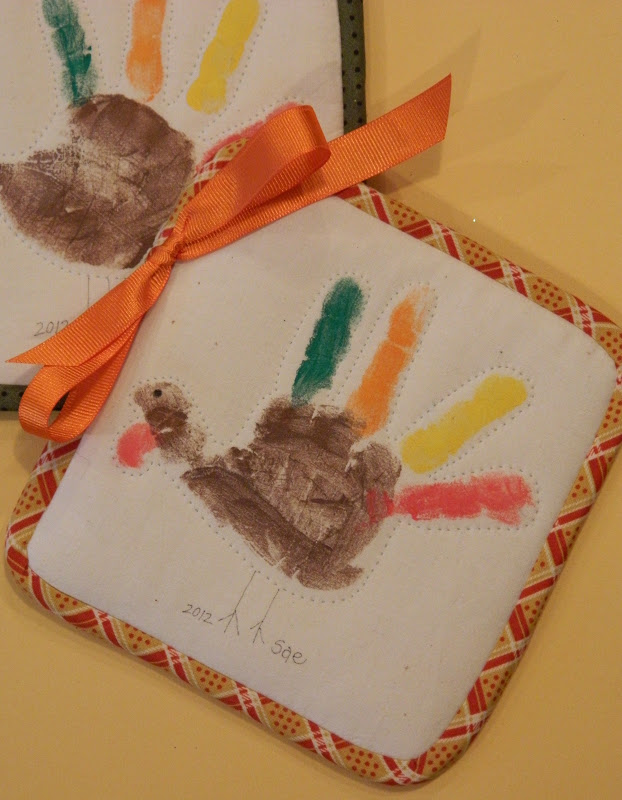
We clipped our hand printed turkey potholders beneath the awnings. Those were accompanied by menus of the day's offerings. Assortments of treats, packed inside cupcake boxes, were identified by the color of package bows; yellow offered two peanut butter and two chocolate chip cookies, orange held three brownies, etc.

Before the onslaught of customers, the twins had a chance to practice their quick-action sales moves! Home made aprons were made special after Bree's Nana embroidered names on each one.


When customers descended, the kids were ready. It was so cute to overhear them describing the goodies and naming random prices for them.


Sae's yia yia, an expert baklava maker, hears a sales pitch for kid-made peanut butter cookies.
Nick brokered a deal with his daddy for muffins....
...and then stashed his cash in the deep pockets of his apron.


Bree enlisted mommy as a sales assistant...


and together they sold Nana a healthy amount of merchandise!

Daddy couldn't wait to buy from his little princess!

Grandparents...the high octane fuel that drives a Sugar Bug Bake Sale to resounding success! 


Full tummies, full wallets, full cookie jars, full shopping baskets.......our first annual Sugar Bug Bake Shop Sale was full of nothing but family fun!

"SMACK! SLURP! BURP! Those home made dog treats won't go to waste either!"

Friday, November 16, 2012

The Turkey Farmer


If you know cats, you know that they are micro managers. Of everything. Gotta see it. Gotta sit on it, next to it, or preferably, inside of it. Oh my yes, sometimes they do annoy me. But I am grateful for them. Grateful for the way their little padded feet have filled our empty nest. Grateful, mostly, for the opportunity to have brought them home - shivering with fear, cold, skinny, or in the case of Mickey, soaking wet. I made them well here, smug with prosperity and plump with gratitude, becoming a hero to myself in the process.

Of course I am grateful for the usual litany....my faith, my family, a multitude of friends and the fortune to live in this wonderful country. But I am also grateful for my pets, especially today for Iggy, the turkey farmer, who has taken on the job of making sure these birds don't get away before I need them!

Thank you Lord, for the cherished companions you have blessed me with....for those with two feet and for those with four!

Friday, November 9, 2012

Sugar Bugs!

Look what came crawling out of grandma's kitchen! Sugar Bugs!

It makes sense. On Fridays, I call my kitchen the "Sugar Bug Bake Shop" because all three of my grandkid baking buddy guests are sweet as sugar and cute as bugs. And boy, do we ever produce in this shop! Even two and four year old attention spans hang in long enough to crank out several dozen cookies or a pair of banana bread loaves on those days. Our best treat though, is our signature "sugar bugs." We craft those for special events like our upcoming family bake sale.


I have the recipe here for the basic bug body, including more pictures and tips. In the meantime, how about some highlights from the day my Sugar Bug Bake Shop baking crew went to work to turn out an entire colony of sweet, but fearsome little critters to sell for equally sweet, but fearsome prices?!


Something about this picture makes me itch! It's the first step in sugar bug construction - either oval (short or long) or round shaped.


Some features are suitable for baking, and those can be added before the bugs go into the oven. Raisins and dried cranberries, for example; those can be cut in half lengthwise and used as stripes on long, skinny bugs.
Red hot spots, too.......


When the long skinnies come out of the oven, poke a wooden skewer into the sides and insert pretzel legs to make formidable centipedes. Sour candy strips make great antennae and the buggy eyes are attached with royal icing. Those items can't go into the oven.

"I can't take my eyes off of you!" I didn't ask the little baker if he'd ever actually tasted those nasty red hots generously piled on the back of this little guy he named "Spot." My guess is "no."


Despite the frightful look of this, no sugar bugs were actually harmed during the decorating process!      


Grandma has observed that if you put out a tray of 500 candy eyes, then the first bug decorated will sport 500 candy eyes. When you offer little bowls of 12 or so, that same critter will manage to see quite well with, well...12 or so of them! I call it "grandma math" and yes, I did learn it the hard way!

These little bowls are 3" small. What they hold is ENOUGH! Really. ENOUGH!


I mentioned grandma math. There's also grandma zoology at play here. See that pretzel stick protruding from center front of bug #3 in the top photo?...it's a proboscis....a useful little thread that insects use to poke around in the grass to find bugs smaller than themselves to vacuum in and eat. I defined it to the kids. The boys looked up at me, frowning, with chubby little cheeks stuffed full of pretzel sticks and chocolate chips. Only their eyes spoke. "Oh grandma. Please. Stop! Save it for 4th grade! We're in pre-school and we came here to have FUN!" With that, I quietly scrapped my plan to feature "entomologist" as the spelling word of the day.

These little red critters have a name. And a story. I call them "Amara Bugs!" My grandma blogger friend, Kc, at Amaraland posted a charming story about her granddaughter's gift of a recipe binder from beloved Aunt Sandy. Kc invited readers to email favorite recipes for Amara's collection. It was quick work to customize a sugar bug into a little red iced spotted critter resembling the ladybugs that Grandma Kc and Amara have joined forces to collect. I love Aunt Sandy's gift idea and it was so much fun to participate in the project of filling it up with recipes that her niece might enjoy making someday - alongside grandma of course!
  
It's a good idea to inform your retail customers about what you are selling to them. In fact, I think it might be federal law! So here's our creatures, all packed up, nestled into dollar store paper party favor buckets and ready to go to market, prominently tagged with the truth: "Caution! Live Sugar Bug!"

             
Speaking of attractive packaging, we had more work to do. The dog shaped pet treats we made last week needed to be counted and bagged and the kids were up for that task, too.

Small paper sacks were decorated with paw shaped stickers and a puppy face rubber stamp. Then we formed an assembly line to efficiently count out six treats per bag. Tomorrow's customers should be pretty happy about taking home a "doggy bag" too!

What an adventure these past weeks have been, preparing for tomorrow's Sugar Bug Bake Shop Sale! I really think we're ready for a big success because the kids have worked hard and are anxious to show off what they've done. In the next few weeks, I'll have all the pictures and the entire story right here. As always, you're invited to come back and read all about it.

We'll be lookin' for ya!                                     

Sugar Bug Recipe

Here's how to make cookie bugs from our "Sugar Bugs!" post.......


Ingredients:                                                               
  • 3 cups flour
  • 1/4 tsp. salt                                            
  • 2 sticks unsalted butter, softened
  • 3/4 cups sugar
  • 1 tsp. almond extract                              
  • 1 large egg
Royal Icing:

  •      1 egg white
  •      confectioner's sugar
  •      food color
Decorating items:

  •      thin pretzel sticks
  •      raisins, currents and/or dried cherries
  •      red hots
  •      icing eyes
  •      roasted peanuts
  •      candy
  •      chocolate chips
  •      sprinkles
  •      wooden skewer
  •      squirt bottles for icing (optional)
Directions:

1.  Whisk flour and salt together in a small bowl. In a large bowl, with an electric mixer at medium speed, beat butter and sugar until light and fluffy (about 2-3 minutes).

2.  Beat in almond extract and then egg. Scrape bowl.

3. Add 1/3 of the flour mixture and blend on low speed. Gradually add remaining flour until combined.

4. Shape into 2 balls and refrigerate, covered with plastic wrap, for at least 2 hours.

5. Preheat oven to 350. Line a baking sheet with parchment and form bugs into 2"-3" ovals or balls, 1" thick. Decorate with items such as red hots, peanuts, raisins or chocolate chips.

6. Bake 15 minutes. As soon as cookies come out of the oven, poke holes with a wooden skewer to insert pretzels or candy strips.

7. When cool, complete decorations with candy eyes and other features attached with royal icing. Mix your own recipe, or use this one if you don't mind raw egg white:

To make a small amount of royal icing, beat one large egg white until foamy and slightly thickened. Add confectioner's sugar 1/2 cup at a time until icing is the consistency desired. Use thick icing to attach eyes and candy, thinner icing in a squirt bottle to draw stripes, etc. Tint with food color.

These sugar bugs just came out of the oven with decorations that can be baked - red hots and chocolate chips for spots and roasted peanut wings.


When children are decorating with royal icing it's a good idea to fill plastic squirt bottles for easiest handling. Here, baked bugs are getting detailed with green icing and other items (candy and pretzels) that must be applied after baking.


This original design, as well as all blog content, is intended for personal use only.
Copyright 2012 All rights reserved.
Thank you!

Friday, November 2, 2012

Something to Gobble About!


For the past month we have been busy sifting and stirring for our upcoming  Family Bake Sale. On Fridays, when the three oldest grandkids join me for the day, we bake up a frenzy of cookies, mini banana bread loaves, muffins, brownies and more.....one third to eat, one third to take home and one third to freeze for the sale. This grandma has also been busy constructing little vendor's carts for the bakers, and Nana (Bree's paternal grandmother) has been sewing up a storm, embroidering names on the aprons the kids will wear while they sell their home baked goodies!


Somebody loves to lick the mixer blades!


Even though it can get a little crazy at times, I feel like I am the luckiest person in the world when I'm at the kitchen counter surrounded by my little buddies. They all respectfully wait their turns to measure or mix, but I'm most impressed with the way the boys "surgically" crack the eggs we need. Lots of skills are learned when kids join grandma in the kitchen!


And lots of things are also learned by grandma when we bake together. For example, there is a reason why muffin recipes advise you to stir only until ingredients are blended. "Do not over mix!" When you don't have the heart to force a little helper to yield while he gleefully operates a "cement mixer," you discover that the baked texture of that muffin is decidedly a different one. Still edible, but "different!"


And I think we all know that if you trust your "roll-out-to-1/4"-thick" cookie dough to the enthusiastic operator of a "steam roller" you can probably cut baking time short by at least 75% !


But enough about baking! That's not what I'm here to gobble about today! Our vendor's carts need to be a visual feast of colors, tastes, and textures. A few gift items might be a good way to show off our crafty side too. So, what's quick, kid-friendly, "kitchen-y" and likely to sell like hotcakes early in the month of November? I know! Hand print turkey potholders and chocolate chip cookie fridge magnets! Think mommies, daddies, aunties, uncles and grandparents would gobble those up along with the edibles? I do!


Last summer, we made "Happy Helping Hands Potholders" to sell at the gift shop of our art show. I found it easiest and cheapest to build them right on top of dollar store purchases and I still recommend doing that. But one more step makes a nicer finished product. Make a "turkey sandwich" of a 9" hand printed muslin square, a layer of thin quilt batting, and a second muslin square for backing, Hand quilt around the basic shape. Draw an eye and legs with fine point permanent marker. Add the year and child's name. Proceed to complete the potholder with instructions you'll find here. Once again, I used fabric paint, although none of our art show customers actually used what they bought from the kids! Unless someone totally "clueless in the kitchen" comes along (grandpa?) you might be able to get away with using regular acrylic craft paint. Adoring relatives will probably just decorate with them anyway!


I also recommend printing the turkeys in several steps. Make the brown body first, then add the feathers one at a time. Use a red finger tip to print the wattle. This method gives you more control over not only the design, but the squirmy little artist too!

I am delighted to have many young moms as readers. If this year's plans are to go "over the river and through the woods to grandmother's house" for Thanksgiving, may I suggest that she would love to be presented with a potholder like this as a hostess gift? And chances are, she won't actually use it either!

Now let's see what Brielle is up to in the Chocolate Chip Cookie Fridge Magnet department!

See these? They are real chocolate chip cookies! After they're baked, you can eat them!
But on the right are cookies my cousins and I made from air dry clay.
After they're dried, we paint them. Don't you dare eat them! Yuck!


Here is how you finish them. First, it's just a coating of light brown paint. Then you dot them with dark brown spots. Those are the "chocolate chips!"  


When the paint's dry, grandma takes over and glues a magnet to the back of each cookie! Yummy! They look good enough to eat!


And we're not done yet! Next Friday we will bake the last of our goodies to sell and also do some custom packaging of the dog treats we made last week. This family of animal lovers has eight (8) dogs between us. Five of those are large, one is medium, and the two little gals, Sandy and Maggie, are mini balls of fluff. They are all rescued. They all love treats. Their families all love them......I think we'll sell out of dog treats even before the "human" ones go out the door!

"Turkey Sandwich" Hand Print Potholder Instructions

Materials Required:

  • Purchased 7" standard potholder (2/$1 at Dollar Tree)
  • Completed muslin hand printed, hand quilted 9" square as described in main post
  • Fabric for backing (9" square) and for bias trim (1/2 yard yields 3 complete potholders)
  • Ribbon, 5/8" wide, 20" long
  • Sewing machine, thread, scissors, needle


1. Cut all tags and loops from potholder. Center the muslin print (right side up) on top of it. With reverse (potholder) side up, machine sew the print to potholder, following inside edge of bias tape.


Shown below, at upper right is step #1 after muslin square is sewn to potholder.


2. Trim seam as close as possible to stitched line as shown below.


3. Center backing fabric (right side out) on opposite side and sew it to potholder. This time, sew with muslin side up, following first stitched line. See bottom left on second photo, above, for detail. Trim excess fabric.


4. Cut 1.5" bias strips from fabric and sew them together to total about 36". If needed, piece them together as shown:


Place diagonal cut ends, right sides together, at a right angle and connect with a 1/4" seam. Iron open, as shown below.


Trim points.


5. Sew the bias trim to outside edge of potholder as shown. Ease around curved corners. Note that beginning end is folded up 1/2" and that trim will start and stop at the point where center of ribbon bow will be attached. The bow will cover the fabric break.


6. Fold bias trim to reverse side, Turn raw edge under and hand sew all around to complete.
7. Tie ribbon into a bow and tack it to front of potholder with a few small hand stitches.


This design, as well as all blog content, is intended for personal use only.
Copyright 2012 All rights reserved.
Thank you!